
Welcome to this in-depth guide on timestamp camera how to use—your go-to resource for learning everything about the Timestamp Camera app. In this walkthrough, I'll guide you through installation, setup, photo and video stamping, GPS and overlay features, tips for best practices, troubleshooting, and seamless workflow integration. Whether you’re documenting a construction site, vlogging your travel adventures, or gathering field research, this guide will help you unlock the full potential of the app, making each timestamped photo or video precise, credible, and polished. Let's get started!

I. Introduction to Timestamp Camera
A. App Overview
Timestamp Camera overlays real-time metadata—date, time, location, and even custom text or graphics—directly onto your photos and videos. Available on Android, iOS, and Windows, it supports over 60 timestamp formats and allows control over text opacity, color, size, and positioning .
B. Use Cases
This tool is ideal for:
Evidence documentation (e.g., rehab treatments, security footage)
Travel vlogs where date and place enhance storytelling
Construction monitoring with accurate logs
Field research, ensuring authenticity with embedded metadata
By baking timestamps and geotags into your media, Timestamp Camera boosts credibility and simplifies record-keeping.
II. Installation and Initial Setup
A. Download & Permissions
Mobile users can find it in Google Play or the App Store. Installation is straightforward—just follow prompts and grant permissions for camera, microphone, storage, and location.
Windows users can download the installer from the developer's website and should run it as an administrator for all features to work properly.
B. First-Time Configuration
Open the app and choose your default timestamp format.
Pick one of six positions (corners or center) for the stamp.
Customize font style, size, color, and opacity for clear display. Adjust margins and backgrounds if needed.
Once you have your settings dialed in, you’re ready to capture with confidence.
III. Basic Photo Capture with Timestamp
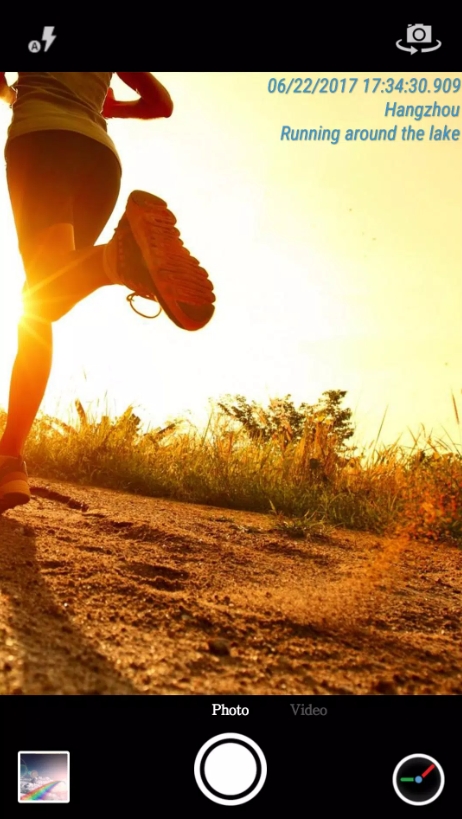
A. Real-Time Overlay
Switch to photo mode, frame your shot, and press the shutter. The live preview will show the real-time timestamp. If "Battery Saver Mode" is active, the preview dims, but the metadata remains visible and accurate .
B. Format Customization
Explore the 60+ timestamp styles—choose between date-only, time-only, full datetime, and more. For video, millisecond-level precision is available. Adjust text opacity and margins to suit lighting and background for optimal clarity.
IV. Video Recording with Timestamp
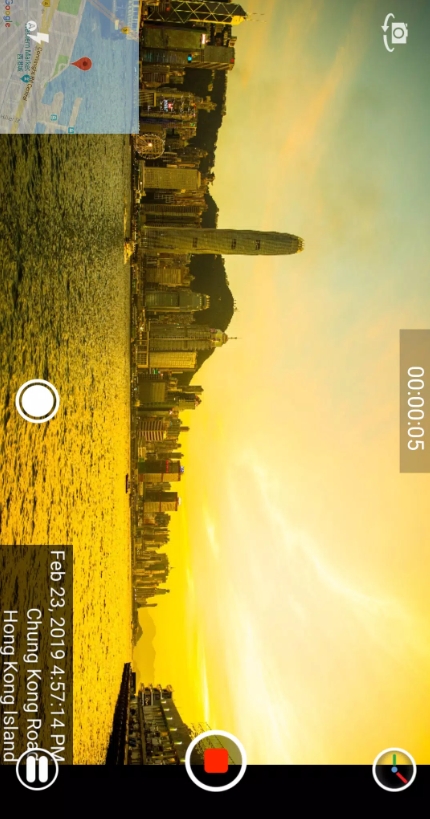
A. Live Video Mode
Swipe or toggle into video mode to start recording with embedded timestamps (and optional GPS). The app lets you pause and resume recording segments, auto-merging clips into a single video .
B. Resolution & Frame Rate
Choose from:
Resolutions: 540p, 720p, 1080p, and 4K
Frame rates: 30 or 60 fps Enable or mute audio as needed. The shutter sound can also be disabled in settings for stealth recordings.
V. GPS and Location Stamping
A. Auto-Location Embed
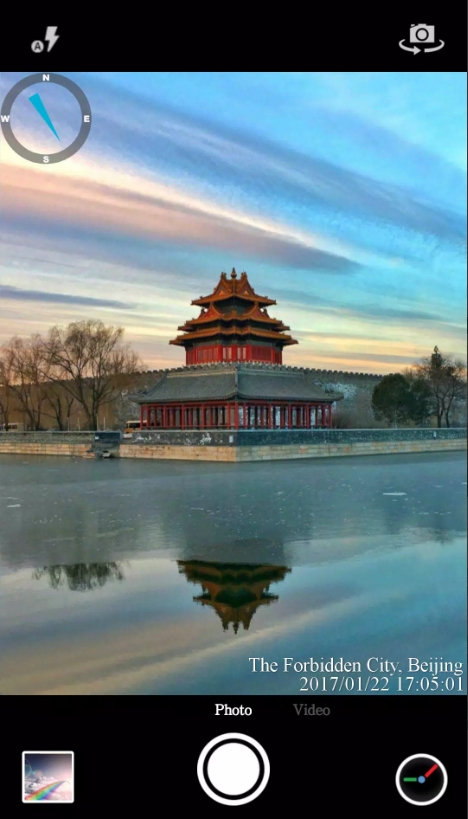
Enable the “Auto Add Location” toggle to overlay your address, city, or latitude/longitude on photos/videos . Choose how precise or brief the location data appears.
B. Map & Compass Overlays
For added context, overlay a mini-map or compass onto your live preview. Customize scale, transparency, and placement to keep your recording clear yet informative.
VI. Advanced Overlay Features
A. Custom Text & Emojis
Want more than just timestamps? Add custom text—like “Site Inspection” or a project name—or even emojis. Position your stamp and tweak background fills for readability.
B. Altitude, Speed, and Tags
If your device has the necessary sensors, display altitude and speed. You can also input tag stamps like project IDs or crew names, which will embed in EXIF metadata for easy organization.
VII. Troubleshooting Common Issues
A. Black or Dark Screen
Manually increase brightness or turn off Battery Saver.
On Android, ensure full-screen permissions; on iOS, confirm camera access.
B. Capture Failures
Check storage permission and correct folder path.
Clear cache or reinstall if the app crashes, especially after updates or if conflicting with ad-blockers.
VIII. Batch Processing and Import
A. Bulk Photo Stamping
Use Batch mode to apply stamps to existing photos in your gallery at once—perfect for retroactive documentation.
B. Virtual Camera Import
Turn your device into a virtual camera feed for livestreams or presentations. Overlays appear live on-stream for professional polish.
IX. Workflow Integration and Sharing
A. Export & Transfer
Photos and videos save to your default camera roll, or to a chosen custom folder. Stamps remain intact when you share to social media or cloud services.
B. Third-Party App Compatibility
Use the stamped media within video editors like KineMaster or CapCut for adding overlays, music, or further edits without losing timestamp credibility.
X. Best Practices and Tips
A. Optimal Settings for Clarity
Choose contrasting colors and adjust text opacity to avoid blending into the background.
Place timestamps away from crowded image areas to maintain legibility.
B. Use Case Recommendations
Documentation: Enable GPS and altitude stamps for audit trails in remote sites.
Events: Use square or timelapse modes for social media content with clear context.
If you’ve been wondering timestamp camera how to use—you've arrived at the perfect guide. This app is a powerhouse for anyone who needs accurate, on-media time, date, and location data. Easy to set up and packed with useful overlays, it’s ideal for Documentation pros, content creators, field workers, and trendsetters alike.
From mastering overlays to publishing properly stamped content in social feeds or professional reports, Timestamp Camera is not just useful—it’s essential. Give these strategies a go, tweak the settings to your needs, and feel free to revisit this guide whenever you want to unlock new features.
Let me know if you'd like a deeper dive into any particular tool or use case—I’d love to help you elevate your content using Timestamp Camera!